Read in English
বাংলায় পড়ুন
The best way to keep your blog or online images safe is to use Copyright Watermark Pattern. Let's see how to add it into an image.
How to add copyright watermark on an image:

Step-1: First open the Photoshop software then click on "New" from the Menu Bar. Make the Background Content - "Transparent", Resolution - 300 px/inch, Width and Height 6 and 4 inch, make Color Mode - "RGB" and click on OK.

Step-2: Now type any copyright text for example-"© 2015 Copyright". To bring the copyright symbol click on "Option-G" (for Mac) or hold down the Alt key and type 0169 (for Windows).

Step-3: To rotate the text press "Ctrl +T" from keyboard (for windows) and "Command+T" (for Mac). To do the rotation job nicely hold down the Shift Key after rotate press the Enter Key.


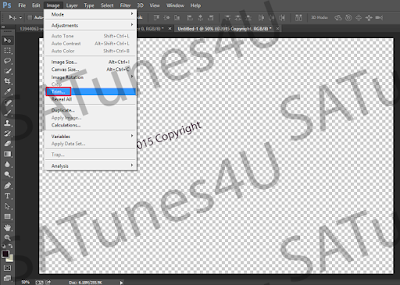
Step-4: Now Click on Image From the Menu Bar, then Click on Trim. A dialog box will appear select Transparent Pixels from here and click on OK. (Text's extra space will be disappear).


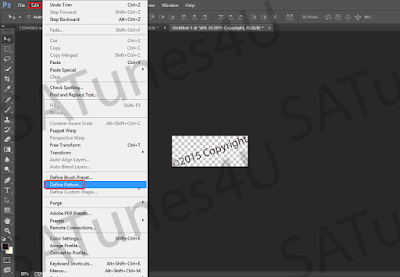
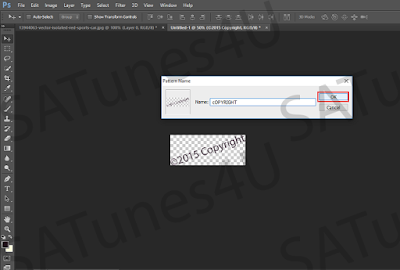
Step-5: Now Click on Define Pattern From Edit (Menu bar). Pattern dialog box will appear Type here copyright or any other name and click on OK .


Step-6: Now open an image or photo in which you want to add copyright watermark pattern and create a new layer [ Shift+Ctrl+N (For windows) / Shift+Command+N (For Mac) ] Or Click on the arrow in the top (Like the photo above) a layer will be created.


Step-7: Click on Fill from Edit (Menu Bar) a dialog box will appear select pattern in "Use" and In Custom Pattern Select the pattern that we made a little bit earlier and click on Ok.

Step-8: Copyright watermark pattern will appear but it will be darker. You can use opacity to decrease or increase its Darkness.


